IMPORT CUSTOMER MASTER DATA THROUGH DATA IMPORT EXPORT FRAMEWORK IN AX 2012
Importing Customer Master Data through Data Import Export Framework in AX 2012 R3
The Microsoft Dynamics AX 2012 Data Import/Export Framework helps you import and export data in AX which include master data, open stock, and balances.
- For Microsoft Dynamics AX 2012 R3, Data Import/Export Framework is included in the release.
- For Microsoft Dynamics AX 2012 R2, Data Import/Export Framework is available in cumulative update 7 for Microsoft Dynamics AX 2012 R2.
- For AX 2012 or Microsoft Dynamics AX 2012 Feature Pack, Data Import/Export Framework is available from Information Source-download.
Step 1: Define Parameters
Navigation: Data import export framework > Setup > Data import/export framework parameters
- Create a folder in your directory
- Browse the location for the folder which is created
- Validate the directory, it will show the Green check box

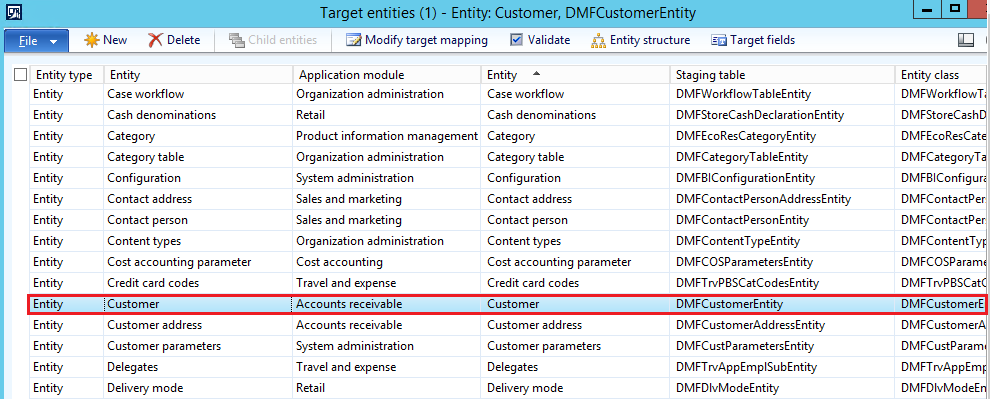
Step 2: Pre-defined Entities in AX
AX has some of the pre-defined entities inbuilt in the application of which we will use one of them.
Navigation: Data import export framework > Setup > Target Entities
Step 3: Create Source Data formats
Navigation: Data import export framework > Setup > Source Data formats
Determine the source of the data to export or import, and create a source data format for the data. For export, the source is AX. For import, you can use any of the following sources:
- AX– Import data from another Microsoft Dynamics AX instance.
- ODBC– Import data from another database, such as Microsoft SQL Server or Microsoft Access.
- File– Import data from a fixed-width or delimited text file, XML file, or Microsoft Excel file.
- Source as “Comma”
- Enter a description for it as “Comma separated file”
- Type – select the type as “File”
- In the General area on the right side of the form select
- Column delimiter as “comma (,)”

Once the above setups are done we will now start creating target entities for which we want to upload the data in AX
Step 4: Create Processing group
Navigation: Data import export framework > Common > Processing group
- Click on New on to create a new group
- Enter group name as Customer
- Enter a suitable description
- Then click on Entities to get the required fields and move on to next step

Step 5: Select entities for processing
Once you click on Entities in the above step it will open a new form wherein we need to create
- Click on New button
- Select the Entity as “Customer” from the drop down
- Select the Source data format as “comma” create in Step 3
- Then click on the Generate source file to select the required fields

Step 6: Generate Source file
Once you click on Generate source file a new wizard will be generated to create a template
- Click on Next

Step 7: Select the required fields to upload the Customer master
- Select the Field name which are required to upload
- By default some of the mandatory fields such as AccountNum, CountryRegionid, CustGroup, Currency are selected
- Apart from them you can select some other fields such as Name, Address, Language id etc.
- Then click on Generate Sample File to generate a notepad for the selected fields with comma delimited
- Click on Finish button

Step 8: Save the file in a folder and then open it in excel
- Place the cell in the first column
- Click on the menu – Data
- Then click on Text to columns
- Click on Next
- Select “Comma” in the delimiters and click on Finish button

Step 9: Enter the data in respective columns.
- You can enter multiple records and make sure customer groups are already created in AX in advance and use the same values in this sheet.
- Once after completion of the data
- Save the file as “CSV (Comma delimited)” in a folder

Step 10: Upload the excel file in the Processing group
Navigation: Data import export framework > Common > Processing group – Entities button
- Browse the file which is created in the above Step 9
- Click on Generate source mapping (an info log will be shown as “Customer’ entity mapping done successfully”)
- The validate the file (an info log will be shown as “Customer’ entity is validated for data import/export”)

Step 11: Preview of the data
- You can get a preview of the data which is to be uploaded

Step 12: Get staging data
Navigation: Data import export framework > Common > Processing group
- Select the Processing group – Customer
- Then click on “Get staging data”

Step 13: Staging job
- A Staging job form will be opened
- Job ID
- Enter the description
- Then click on OK

Step 14: Run the staging data
- You can even get the preview of the data at the lower pane of the form
- Click on Run button to execute the staging

- We can even setup Batch processing by selecting the Batch check box and setup Recurrence
- To execute the job immediately, Click on OK

- An info log is generate for the same showing the number of records inserted

Step 15: Copy data to target
Navigation: Data import export framework > Common > Processing group
- Select the Entity – Customer
- Click on Copy data to target

Step 16: Select a Job Id
- Select the Job ID which is created in the above Step 13
- Click on OK

Step 17: Run the Job
- Select the Entity and Run the Job

- We can even setup Batch processing by selecting the Batch check box and setup Recurrence
- To execute the job immediately, Click on OK

- An info log is generate for the same showing the number of records inserted

Step 18: View the records uploaded in AX
Navigation: Accounts Receivable > Common > Customers > All customers
- Filter with the starting alphabet “C-*” to view the records
- 3 Customer records are created
- We can edit and enter additional information if required

Note: The same process can be used to upload the Vendor Master, for this you need to create Processing Group as Vendor in Step 4 and select the Entity as Vendor in Step 5 and continue with the rest of the steps.
IMP Links:
http://ax2012xppdataimport.blogspot.in/
http://ax2012exceldataimport.blogspot.in/
http://axkanha.blogspot.in/2015/03/microsoft-dynamics-ax-2012-dixf.html
https://daxusers.wordpress.com/2014/08/06/import-customer-master-data-through-data-import-export-framework-in-ax-2012/
No comments:
Post a Comment